
Plugging in an OBD2 scanner takes about five seconds, but doing it carelessly can corrupt keep-alive memory in your ECU, reset learned adaptive values, or drop an active scan mid-session. Most data loss issues trace back to three mistakes: connecting while the ignition is in the wrong position, using a scanner with unstable firmware, or disconnecting during an active communication session. This guide covers each step in the correct order so your scan completes cleanly and your vehicle’s stored data stays intact.
Understand What Data Is Actually at Risk
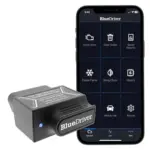
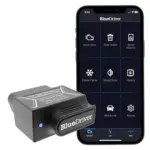
OBD2 scanners communicate with your vehicle’s ECU and supporting modules over a shared data bus. The data that can be affected falls into three categories. First, diagnostic trouble codes (DTCs) stored in the ECU — these are read-only during a scan unless you actively send a clear command, so they are not at risk from a normal connection. Second, keep-alive memory (KAM), which stores learned values like idle trim, fuel trims, and transmission shift points — this data lives in a volatile memory area that some scanners can inadvertently reset if they send unexpected initialization commands. Third, active sensor readings and live data streams, which can drop or freeze if the connection is interrupted mid-session. The scanners most likely to cause KAM corruption are cheap Bluetooth dongles running unstable ELM327 clones with poor protocol handling. A scanner built around a properly licensed OBD2 stack will complete its handshake without sending unsolicited reset commands to the module. Knowing which category of data you are working with tells you how careful you need to be at each step of the process.
Prepare the Vehicle Before Connecting
The order of operations matters more than most guides acknowledge. Start by parking on a level surface and turning off all accessories — climate control, stereo, rear defrost. These draw current that can cause voltage fluctuations on the data bus during the scanner’s initialization handshake. Next, check your battery voltage with a multimeter before connecting the scanner. A battery below 12.0V under no load indicates a weak cell that may drop further when the scanner draws current through the OBD2 port, and some ECUs will log a low-voltage fault or reset KAM if voltage dips below the module’s threshold (typically 9.6V to 10.5V depending on manufacturer). Turn the ignition to the key-on, engine-off (KOEO) position before inserting the scanner. This powers the OBD2 port at 12V and allows the scanner to complete its initial handshake while the engine is not adding electrical noise from the alternator or ignition coils. Do not start the engine until the scanner has fully initialized and displayed its main menu — most handheld scanners take 8 to 15 seconds to establish communication from a cold start. Starting the engine during this window can interrupt the handshake and cause the scanner to report a failed connection or, on some platforms, send a retry command that the ECU interprets as a reset request.
Connect, Navigate, and Avoid Accidental Resets
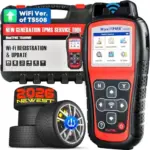
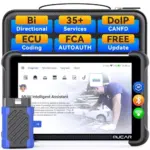
Insert the OBD2 connector firmly until it clicks into the port — a partial connection creates intermittent contact that can drop data mid-read, which is the most common cause of incomplete diagnostic sessions. The OBD2 port is typically located within 24 inches of the steering column on the driver’s side, though some vehicles (notably certain Hondas and older BMWs) place it behind a trim panel near the center console. Once the scanner boots, navigate to your target function before doing anything else. The clear codes function and the read codes function are usually adjacent in the menu tree, and selecting the wrong one is a real risk if you are moving quickly. On scanners that combine both functions on a single screen, the clear command typically requires a confirmation step — read that confirmation prompt before pressing accept. If you are running a live data session, avoid navigating away from the active stream screen without first pausing the log. Interrupting a live data stream on some Autel and Launch units will close the session cleanly, but lower-end scanners may leave the communication channel half-open, which can prevent a clean reconnection and requires a full ignition cycle to reset (see the diagnostic scanner comparison guide for how session handling differs across tool tiers).
Disconnect Safely and Verify Data Integrity
Never pull the scanner connector while the device is mid-scan or actively displaying live data. Wait until the scanner has returned to its idle home screen, which confirms the communication session has been closed from the tool’s side. Then turn the ignition to the off position before removing the connector. This sequence — end session, ignition off, remove connector — ensures the ECU has saved any updated diagnostic status to non-volatile memory before the power rail drops. After disconnecting, perform a quick verification: turn the ignition back to KOEO and note whether any new warning lights have appeared on the dashboard that were not present before the scan. A correctly executed scan will not introduce new codes. If a new code appears, it is almost always a pre-existing fault that the scan session surfaced rather than one the scanner caused, but the timing can be confusing. Battery-related codes (B1000-series on many platforms) are the exception — these can appear if your battery was already marginal and the scan session pushed it further. Vehicles with advanced driver assistance systems (ADAS) and multiple ECUs, such as modern Toyotas and Mercedes-Benz models, are more sensitive to bus interruptions than older vehicles with a single ECU, so the ignition-off step before disconnection is especially important on post-2018 vehicles. The guide covering entry-level scanner options breaks down which tools handle session termination automatically versus requiring manual steps, which is worth checking if you are new to the process.
Connecting an OBD2 scanner safely comes down to four fixed habits: verify battery voltage before connecting, use KOEO not running engine during initialization, never interrupt an active session, and remove the connector only after the ignition is off. The tool you use matters too — devices built on a properly licensed OBD2 protocol stack handle handshaking and session termination cleanly without sending unintended reset commands. Following this sequence consistently means your ECU’s adaptive memory stays intact and your scan data is complete every time (a reviewed selection of reliable OBD2 scanners can help narrow down tools with stable protocol handling across vehicle platforms).
Affiliate Disclosure
This post contains affiliate links. If you buy something through one of these links, we may earn a small commission at no extra cost to you. We only recommend products and services we trust. Thank you for supporting this site!