
A fault code tells you a system failed a threshold. It does not tell you why. Freeze frame and live data are the two data sets that fill that gap, and using them together is what separates an accurate diagnosis from an expensive parts guess. Most technicians use one or the other in isolation, which is exactly how misdiagnoses happen.
What Freeze Frame Data Actually Contains
Freeze frame is a snapshot the ECU saves at the exact moment a fault code sets. The module captures a fixed set of parameters at that instant: engine load, coolant temperature, fuel trim (short and long term), engine speed in RPM, vehicle speed, and MAP or MAF sensor values depending on the engine management system. The specific PIDs captured vary by manufacturer, but those core values are standardized under OBD2.
The critical thing to understand is that freeze frame is a single point in time, not a trend. It tells you the engine’s operating conditions when the fault crossed the threshold to set the code. A P0171 (system lean, bank 1) with a freeze frame showing 14.2% positive short-term fuel trim at 2,400 RPM and 67% engine load is a very different problem than the same code captured at idle with 18.6% short-term fuel trim and a coolant temperature of 41 degrees Fahrenheit. Same code, different root causes. Freeze frame gives you the context you need to know where to start looking, not just what broke.
How Live Data Fills the Gap Freeze Frame Leaves
Freeze frame is historical. Live data is real time. Once you know the conditions under which the fault set, live data lets you recreate those conditions and watch the relevant sensors behave as they actually happen. This is where the diagnostic picture becomes complete.
Pull up your live data stream and filter it down to the parameters that showed up in freeze frame. If freeze frame showed elevated fuel trims at part throttle under load, replicate that condition on a test drive while monitoring short-term and long-term fuel trim simultaneously. If both trims are pulling positive across all RPM ranges, you are likely looking at a vacuum leak or a failing MAF sensor. If the trims are only elevated at idle and normalize above 1,500 RPM, the MAF is usually fine and you are chasing a small vacuum leak or a dirty throttle body affecting idle airflow specifically.
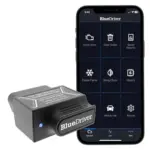
The live data stream also catches intermittent faults that freeze frame misses entirely. An O2 sensor that drops out for 200 milliseconds will not show in freeze frame if the fault has not yet set to confirmed status, but you will see the voltage flatline in live data if you are watching during the right condition (see the OBD2 scanners with live data coverage for what sampling rates and PID counts to look for in a tool). Freeze frame points you at the window. Live data lets you look through it.
Building a Repeatable Diagnostic Workflow
Start every diagnosis by reading and recording the full freeze frame before you clear anything. Write down or photograph every value the scanner shows, including the warm-up cycles and distance traveled since the fault set. Clearing codes before noting freeze frame data wipes that snapshot permanently.
Next, cross-reference the freeze frame values against known-good specifications for the vehicle. Coolant temperature at the time of fault matters significantly. A cold engine running with fuel trims that look lean is often a cold-start enrichment failure, not a vacuum leak. An engine that set the fault at full operating temperature with stable idle conditions points toward a different failure mode entirely.
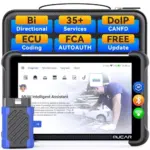
Then build your live data graph with the five to eight PIDs that are most relevant to the code and the freeze frame conditions. Most capable scanners let you create custom PID groups rather than scrolling through 80 parameters at once. Graph view is preferable to numeric view for anything related to fuel trim, O2 sensor switching, or MAF flow rate because trends and drop-outs are impossible to see in a scrolling number list. Run the engine at the RPM and load condition captured in freeze frame and hold it there for at least 60 seconds while watching the graph. That is where the failure pattern usually becomes visible. Scanners with bidirectional control, covered in detail across tools that can send commands back to vehicle systems, add the ability to activate components like fuel pumps and EGR valves during this phase to isolate variables faster.
Common Mistakes That Invalidate Both Data Sets
The most common mistake is using live data without first reading freeze frame, which means you are monitoring without a hypothesis. You end up watching numbers change with no reference point for what abnormal actually looks like in the context of the fault.
The second mistake is treating long-term fuel trim as the primary indicator. Long-term fuel trim is a learned correction that builds over hundreds of drive cycles. It reflects the average error the ECU has been compensating for, not the current fault condition. Short-term fuel trim is the real-time correction. When diagnosing an active fault, short-term trim tells you what is happening right now and whether the condition you are inducing is triggering the same response the ECU recorded in freeze frame.
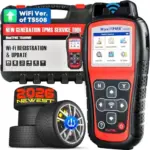
A third mistake is sampling too many PIDs at once. Every additional PID you add to a live data stream reduces the sampling rate per PID because the scanner and the vehicle bus have finite bandwidth. On older CAN bus vehicles, pulling 40 simultaneous PIDs can drop your sample rate to one reading per two seconds per channel, which is too slow to catch sensor drop-outs. Narrow your PID list to what is directly relevant and your data quality improves immediately. The right tool matters here too; budget code readers often cap PID counts and sampling rates in ways that make this workflow harder to execute reliably.
Freeze frame and live data are not redundant tools. They answer different questions. Freeze frame tells you what the engine was doing at the moment of failure. Live data tells you whether that failure is repeatable and gives you a real-time window to isolate the cause. Used together in sequence, they cut diagnostic time significantly and eliminate the parts-swapping cycle that makes repairs expensive. The diagnostic scanner comparison guide covers which tools support custom PID grouping and graphing, which matters when you apply this workflow in practice.
Affiliate Disclosure
This post contains affiliate links. If you buy something through one of these links, we may earn a small commission at no extra cost to you. We only recommend products and services we trust. Thank you for supporting this site!